Class Resources
Several activities that we use at Science Festivals and Schools workshops might be adapted for classroom use.
- A simple spectrometer can be made using a CD as diffraction grating. Despite the simplicity it is possible to distinguish between different types of light sources.
- A camera can be made using a lens and tracing paper (or photographic film) to view (record) the image.
Please find details of these activities below.
Safety Notice:
- NEVER look directly at the sun or laser sources with any optical device (lens, camera, or spectrometer). Focussing sunlight or laser light into the eye can result in permanent eye damage – you should NEVER look at the sun or a laser source through the lens, camera or spectrometer.
- Adult supervision is required at all times when assembling or using the lens, camera, or spectrometer.
- DO NOT leave a lens unattended in sunlight – focussed light can be a burn/fire risk. Store lenses in a box out of reach of children.
CD Spectrometer
White light is made up of all the colours of a rainbow. The visible light we see is actually only part of the ‘electromagnetic spectrum’ that includes X-rays, Ultra Violet light, Visible light, Infra-red radiation, Microwaves, and radio waves.
There are many ways to split white light into the colours of a rainbow: look closely at soap bubbles or oily films on water where ‘interference’ causes the different colours to be seen. Cut glass shapes often produce miniature rainbow patterns when sunlight shines through them, this is due to dispersion. Or you can use a regular repeating pattern to split the colours, this is called diffraction. The scale of the pattern required to do this is very small (on the same scale of the wavelength of light). Look at light reflected by common CD’s and DVD’s where the ‘track’ on the CD can perform this task – often you can see all the colours of the rainbow as a result of diffraction off the tracks on the CD.
Each colour has a different ‘wavelength’ and a spectrometer is a device designed to separates the different colours (or wavelengths) of light. The template and disc supplied can be folded and taped into a simple box. Inserting the CD allows the spectrum of different light sources to be viewed – the light enters in through the small slit at the top of the box and is viewed through the round eyehole. You will have to push the CD right into the slit (the CD will make the slit longer if necessary) and you may find it helpful to use a piece of tape to hold the CD in place.
Try looking at different light sources – incandescent light bulbs, LED lamps, fluorescent lights, and sodium lights all have different spectra. Sunlight has the complete visible spectrum, BUT NEVER look directly at the sun. Instead perform this on a cloudy day and look at the diffuse light from clouds. You should NEVER use this spectrometer with any Laser source.
The template for this spectrometer is available for download (spectroscope_template.pdf)
DIY Photography
You can make a basic camera using simple bi-convex lens to focus an image onto a piece of tracing paper that can act as a screen. By choosing a lens with a focal length of approximately 200mm you will need a box that is longer than 200mm for this to work (something in the region of 200-400mm will work). To allow you to focus the image it can be helpful if the length of the box can be varied. We have had success using 200mm Focal Length Biconvex lens (OP11555) from TIMSTAR.
Tips to make this work better:
- Try to tape the tracing paper screen so that it is held flat.
- Try painting the inside of the box black – this will reduce scattered light and improve the contrast of the image.
- You might find it useful to have a cloth to put over your head and the back of the camera – so that you view the screen with less background light.
- If possible use ‘magic tape’ on the lens rather than sellotape – as it leaves fewer residues on the lens when removed. However sellotape will work fine.
- A smaller hole behind the lens will improve the ‘depth of focus’ of the camera, but the images will not be as bright. Just like a real camera there is a compromise between the depth of focus and the amount of light entering the camera.
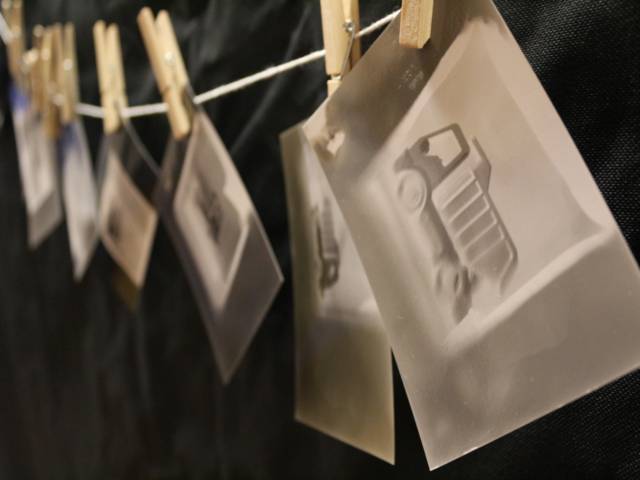
Note that when you see an image it is upside down and back to front, but otherwise should be in colour. With appropriate adjustment of the camera length and distance to the object you should be able to get a really sharp image.
We have had used these cameras to take photographs of test objects too. Toys with contrasting well defined colours work best as subjects. In our experience Ilford Ilford MGIV RC Deluxe Glossy B&W Photopaper, Ilford Multigrade Developer and Ilford Rapid Fixer work well, and a good starting point for exposure time is 20 seconds. but this will vary depending upon exact lens, camera design, object and illumination used. Good Luck!